WARNING

These post or any other post are based on my experienced life I've been through.

If you think those post or any other post annoyed you, I suggest you leave my blog.

DON'T READ!

DON'T COMMENT!

DON'T HARASSING MY BLOG WITH HATES COMMENTS!

JUST GET OUT WHEN YOU THINK THIS IS ANNOYING!

OR LOOK AT MY PICTURE IS ANNOYING!

I didn't ask for a pity or anything from readers. I'm just expressing myself.

Monday, May 27, 2013

Busy.. busy.. busy...

-Hello, everyone!
Sorry not a post about tutorial today..
Been busy promoting my blogshops.. So please do visit them^^
You can look at them on My Links at the sidebar on your right~~ =)
If you can't find it; then I'll give you here..
Contact Lens Shop --> ~Purplelicious Passion~ Online Shop
Clothings, Bags, etc --> ~ Lavender Love~ Online Shop
Now I'm currently searching for the best drop-down menu for my blogshop!
Fortunately, I've made 2 drop-down menus for one of my blogshop..
Sadly, for me, I'm in dilemma in between choosing between those two!!! >.<

If you look at my blog, it's a bit messy.. Sorry about that.. >.<
If you read this 2 or 3 years after the post date, then my blog probably different than before..
Anyway..

You can leave a comment below on which Tab you like~
The most like, I'll put it as my Tab Menu on my blogshop^^

These drop-down menus, I was going to put it on  ~Purplelicious Passion~ Online Shop
So, which one is the best?? =D

Dropdown Menu 1


Dropdown Menu 2


So, leave me a comment on which one you like ^^
I'll put up the tutorial for both dropdown menus soon~~ =)

Thank you for reading my blog =D


Sunday, May 19, 2013

Tutorial : Breadcrumbs Navigation for Blogger

Hi, everyone! Today I would like to show you,
how to make breadcrumbs!

Nope, not this BREADCRUMBS =x=

This breadcrumbs~

What is 'breadcrumbs' you ask?
Breadcrumb navigation helps your readers to track their position on your blog by showing a breadcrumb trail in this way (You're HERE : Home » Label Name » Post Title).This navigation appears just above of the your post title and the links are a trail from the homepage to post title.There is also option for showing the multiple labels in this navigation i.e. if any post have more than one label then it will show all of them.

The tutorial a bit tricky for newbie, but I'll try my best to show you step by step slowly~~

So, Let's Start!

First!

Go to your Blogger

Then to Design Tab (the red circle)

Then to Template

Then Edit HTML

*be sure to copy your template for precaution!


1. The first thing you need to do, find this highlight code;

<b:includable id='main' var='top'>

Found it? Okay! Copy the code below and paste it above the highlight code

Like so~~


COPY START HERE
----------------------------------------------------------------

<b:includable id='breadcrumbs' var='post'>
<!-- Breadcrumbs hack. By Hoctro 9/11/2006 http://hoctro.blogspot.com -->
<b:if cond='data:blog.pageType == "item"'>
<p class='breadcrumbs'>
<span class='post-labels'>
<b:if cond='data:post.labels'>
You are here:
<a expr:href='data:blog.homepageUrl' rel='tag'>Home</a> &gt;
<b:loop values='data:post.labels' var='label'>
<b:if cond='data:label.isLast == "true"'>
<a expr:href='data:label.url' rel='tag'> <data:label.name/></a>
</b:if>
</b:loop>
<b:if cond='data:post.title'>
&gt; <b><data:post.title/></b>
</b:if>
</b:if>
</span>
</p>
</b:if>
<!-- End of Breadcrums Hack -->
</b:includable>


----------------------------------------------------------------
END HERE

* This code will only display the last label of the post in the breadcrumb. If you want to display all the labels, DELETE THE HIGHLIGHT CODE

So, it'll look like this,

BEFORE DELETE  HIGHLIGHT CODE

AFTER DELETE  HIGHLIGHT CODE


NEXT,

2. Find this HIGHLIGHT code

<b:if cond='data:post.dateHeader'>


Then add the CODE BELOW above those HIGHLIGHT CODE

COPY START HERE
---------------------------------------------------------
<b:include data='post' name='breadcrumbs'/>

---------------------------------------------------------
END HERE

Like so, 


Next,

3.  Find this HIGHLIGHT CODE

]]></b:skin>

Then paste the code below above the HIGHLIGHT CODE

COPY START HERE
---------------------------------------------------------

.breadcrumbs {
border-bottom:1px dotted #000;
margin:2em 0 0.5em;
padding:0 0 0.5em;
}

---------------------------------------------------------
END HERE


Like This,


(Feel free to modify the first & third parameters of the last two lines (in bold) to expand/shorten the top & bottom heights.)

And DONE! Save it!!

Thank you for your time to read my blog^^
I hope you get it! Gudluck~~ ^_~


cr : hoctrointro.blogspot.comHelperblogger.com

Saturday, May 18, 2013

Tutorial : Image Slider for Blogger II

Hello, everyone. Okay, this one I'm gonna tell you how to change the slider's
the border color
the ribbon
the caption font
the shadow box color behind caption


You see what I've changed my slider? =D


BEFORE

AFTER

So, LET'S START!
Here's how you do it!!


STEP 1 : The Ribbon

Open your LAST HTML/Javascript 
WHERE U INPUT IMAGE SLIDER BLOGGER CODE

Go to this PART of the CODE or CTRL+F (the word I bold)
----------------------------------------------------------------------------------
#ribbon {
width: 111px;
height: 111px;
position: absolute;
top: -4px;
left: -4px;
background: url(https://blogger.googleusercontent.com/img/b/R29vZ2xl/AVvXsEgVknrJTyHPfhRWenVpvOhpXxEM2aBZnddFeBk3b0sxICKcT9KDPF94L1qoocRxhs0L1VeUVoUCIysRc0_WJwZ0WiEqK_IfDyzTpULjb0uPyhlhdgWNQAEs5I33wT6gm5cgjrA6eWx2Npc/s1600/helperblogger.com-ribbon.png) no-repeat;
z-index: 7;
}
------------------------------------------------------------------------------
REPLACE the HIGHLIGHT words with your own image URL,
u either google the ribbon or edit your own.

I edit my own. Then I changed it.


From this ---> 

Since my blogshop in PURPLE color, I google the purple corner ribbon  and edit it ^^

The picture size is 109x109 pixels for that code, so make sure it'll fit perfectly!

Done for the ribbon! NEXT!


STEP 2 : The border/The Frame


Go to this PART of the CODE  or CTRL+F (the word I bold)
------------------------------------------------------------------------
#sliderFrame {
position: relative;
width: 500px;
margin: 0 auto;
border:5px solid #000;
}
------------------------------------------------------------------------------

You change the HIGHLIGHT word to any colors you want!
Go here to get the HTML COLOR CODE

I choose #611745 for my border colour =)

Next!


Step 3 : The Caption Font & Shadow Box

 
Go to this PART of the CODE
-------------------------------------------------------------------------------------
div.mc-caption-bg {
background-color: black;
}

div.mc-caption {
font: bold 14px/20px Arial;
color: #EEE;
z-index: 4;
padding: 10px 0;
text-align: center;
}
--------------------------------------------------------------------------

Caption background-color aka the shadow box HERE

The font Size & Style HERE

Font Color HERE


And THAT'S IT!

Save then YOU'RE DONE! =)


Thanks for your time reading my blog. =D

Friday, May 17, 2013

Tutorial : Image Slider For Blogger I

Hello, everyone. I got a good thing for you!
I'm now trying to update my blogshop into more interesting this lately.
For hours, I've searched for the best slider for my blogshop. Then, EUREKA! I found it!!

And now I would like to share with you guys!^^

It will look like this~~

Or, you want to look at it live, go to my blogshop HERE
or HERE


Isn't it exciting?! =D

Now, let's get start it!!


FIRST!

Go to your Blogger

Then to Design Tab (the red circle)

Then to Layout

Click on Add a Gadget

Choose HTML/Javascript

Then Copy And PASTE the Code Below!


COPY START HERE
------------------------------------------------------

<style type="text/css">

/* JavaScript Image Slider By http://www.helperblogger.com/ */

#mcis {
display: none;
}

#sliderFrame {
position: relative;
width: 500px;
margin: 0 auto;
border:5px solid #000;
}

#ribbon {
width: 111px;
height: 111px;
position: absolute;
top: -4px;
left: -4px;
background: url(https://blogger.googleusercontent.com/img/b/R29vZ2xl/AVvXsEgVknrJTyHPfhRWenVpvOhpXxEM2aBZnddFeBk3b0sxICKcT9KDPF94L1qoocRxhs0L1VeUVoUCIysRc0_WJwZ0WiEqK_IfDyzTpULjb0uPyhlhdgWNQAEs5I33wT6gm5cgjrA6eWx2Npc/s1600/helperblogger.com-ribbon.png) no-repeat;
z-index: 7;
}

#slider {
width: 500px;
height: 218px;
background: #fff url(https://blogger.googleusercontent.com/img/b/R29vZ2xl/AVvXsEjUN92mPKWgTx3rtHVqrWius7N-WBdjSV-NXwDNj-VPVZBuLFIr-Rj2pA0OCy3NXnXFQprUyLBC26-ideA2HkrGGKD27wyF6K_ewsoV3oZ2wi5r6rdoq8Rj7HfzskMkDXxD-rA3tstAQUU/s1600/helperblogger.com-loading.gif) no-repeat 50% 50%;
position: relative;
margin: 0 auto;
box-shadow: 0px 1px 5px #999999;
}

#slider img {
position: absolute;
border: none;
display: none;
}

#slider a.imgLink {
z-index: 2;
display: none;
position: absolute;
top: 0px;
left: 0px;
border: 0;
padding: 0;
margin: 0;
width: 100%;
height: 100%;
}

div.mc-caption-bg, div.mc-caption-bg2 {
position: absolute;
width: 100%;
height: auto;
padding: 0;
left: 0px;
bottom: 0px;
z-index: 3;
overflow: hidden;
font-size: 0;
}

div.mc-caption-bg {
background-color: black;
}

div.mc-caption {
font: bold 14px/20px Arial;
color: #EEE;
z-index: 4;
padding: 10px 0;
text-align: center;
}

div.mc-caption a {
color: #FB0;
}

div.mc-caption a:hover {
color: #DA0;
}

div.navBulletsWrapper {
top: 250px;
left: 190px;
width: 150px;
background: none;
padding-left: 20px;
position: relative;
z-index: 5;
cursor: pointer;
}

div.navBulletsWrapper div {
width: 11px;
height: 11px;
background: transparent url(https://blogger.googleusercontent.com/img/b/R29vZ2xl/AVvXsEiNz77wS3IdqL68uf2TrAT2lnzZfu-JNHNKtzhKDd4ZJ9nqeRWop72VDth4CzxwQzKNNdZBMUzl_kbniC003N5BII96xwyMZSkqt5ZIgzfrnx_ylAdJ11IRBdjvRv1me3vdEK6T2eVddIg/s1600/helperblogger.com-bullet.png) no-repeat 0 0;
float: left;
overflow: hidden;
vertical-align: middle;
cursor: pointer;
margin-right: 11px;
_position: relative;
}

div.navBulletsWrapper div.active {
background-position: 0 -11px;
}

#slider {
transform: translate3d(0,0,0);
-ms-transform: translate3d(0,0,0);
-moz-transform: translate3d(0,0,0);
-o-transform: translate3d(0,0,0);
-webkit-transform: translate3d(0,0,0);
}
</style>

<script src="http://code.helperblogger.com/js-image-slider.js" type="text/javascript"></script>

<div id="sliderFrame">
<div id="ribbon"></div>
<div id="slider">

<a href="#"><img src="http://images.helperblogger.com/jsSlider/helperblogger.com-1.jpg" alt="Caption Here"/></a>

<a href="#"><img src="http://images.helperblogger.com/jsSlider/helperblogger.com-2.jpg" alt="Here"/></a>

<a href="#"><img src="http://images.helperblogger.com/jsSlider/helperblogger.com-3.jpg" alt="The slide is a linking image"/></a>

<a href="#"><img src="http://images.helperblogger.com/jsSlider/helperblogger.com-4.jpg" alt="Pure Javascript. No jQuery. No flash."/></a>

<a href="#"><img src="http://images.helperblogger.com/jsSlider/helperblogger.com-5.jpg" alt="Insert Caption"/></a>
</div></div>

------------------------------------------------------
ENDS HERE


I know you're curious about the highlight words.
Let me explain for ya! ;)

IMPORTANT : Before adding images to slider, resize all of them to same size. HOW?

#slider {
width: 500px;
height: 218px;

 As you look at the size of the slider [LIKE THIS part of code ABOVE], Make the picture this SIZE!


RECOMMENDATION: I suggest you didn't change the slider width & height, or it'll turn UGLY!
Trust me, I'VE BEEN THAT =.=


Color code info:

Width Slider
Set the width of slider according to your image width also use the images of same width and same heights.

Height Slider
Set the height of slider according to images height also use images of same width and height.

Your URL/website link
If you want to add any link to image then replace # with your own image URL.

Image URL
 Replace all highlighted image URL's with your own images URL.

Image Caption
 Here you can add your image caption.


Make sure you
Grab your HTML/Javascript widget and put it under your Header

SAVE, THAT'S IT!

=)


If you want to add more pictures in your slider, just copy and paste this code

<a href="#"><img src="http://images.helperblogger.com/jsSlider/helperblogger.com-1.jpg" alt="Caption Here"/></a>


Don't worry with the bullet button below slider, it will automatically available as you add on.
Ok? =)


Yeah!
Thank you for your time to read my blog^^
Good Luck~

My next post is on how to change the slider color! =)

cr : Helper For Blogger

Wednesday, May 15, 2013

I want to EXPLAIN MYSELF REGARDING "THIS IS ME" POST

Hello, everyone. This is me again. But, THIS TIME, I want to explain myself regarding to "This is Me" post.

I received a harassment comment from this "TUT"


Ok, from those " This is Me" post.
Please read those post if you please. Coz this STORY is about that post!

I WANT TO EXPLAIN THIS OUT CLEAR
I would like to ensure you that post is NOT MEANT TO,

BEGGING FOR MERCY.
"SHOW-OFF" I'M HOT.

FURTHERMORE,
THIS IS LIKE A DIARY TO ME.

I'VE EVEN SAID SO ON MY VERY FIRST POST

I write that post to let out the positive feelings in me. I let it all out of me!
Even to give courages or positive spirit to those out there who had the same situation happen like me.

F.Y.I, I have oversea friends (my unnies <3) who read my post as well!
Most of my haters don't know English, so that's why I wrote all my entries in ENGLISH! 
I dun care if it's BROKEN ENGLISH. As long as they don't understand, Fine by me!
(Next time, I'll write in undetectable language) =.= 

I want to explain parts by parts! This is gotta be the longest post I ever post. Hopefully not. 
I WANT TO MAKE IT CLEAR, RIGHT NOW!

Those "This is Me" post is about me being all alone coz 
people in my college didn't want to friends with me because of the personality or the truth about myself. 
Like I said in those post the reasons are dot dot dot. TRUE STORY.

Therefore, I even stated a positive cheers and mind to avoid sadness or frustration for those readers out there who have the same problem as I am. Even I put a lyrics that related to this post! 

Apparently, "TUT" didn't get the POINT!

Start from this part:
And I found out why they didn't wanna hang-out with me. Okay, this friend told me, she heard one of the classmates who I'm currently in right now, told her.. "I SAID"
I repeat.. I SAID THAT "MOST OF THEM WANNA FRIENDS WITH ME BECAUSE OF MONEY"

I know that I'm some people said "wealthy daughter" but I never show off.. And I'm not proud of it!

The reason,
I didn't show off as "wealthy daughter" because I don't want they think like that.
Sometimes, avoid of being used, too. 
I hide these identity or personality to avoid that since HIGH SCHOOL. 
I've been those "being used" experience in primary school.
I hate when some of those people said; 

"Lucky for you Melissa, you're rich girl. You can have anything you want. While we're living poor in the old house, no cars, no money to travel anywhere you want" or

"Melissa, I know you didn't want to be friends with poor people like us. You sure like to be friends with the daughters/sons of Tengku's or Datin's.." etc

Honestly, the people who works and earn those money are my parents. So, THEY ARE RICH. NOT ME.

HONEST TRUTH, I DIDN'T SAID TO THOSE PEOPLE 
"MOST OF THEM WANNA FRIENDS WITH ME BECAUSE OF MONEY"

like  "This X person always used my money" or "This Y person gets closer to me because of money"

NO!

I friends with all the people honestly and equally. I didn't care their status, religions or physicals.
There are lots of kind of people (I meant personalities),
some are "that" kind of person, but I didn't said THEM,  
you'll never know people unless you get to know them.

THE POINT IS BEING CAREFUL WITH THE PERSON YOU'RE FRIENDS WITH.
THAT'S MATTER. I'M NOT BEING CHOOSY. 

I love to be friends with all people. As long as, we're;

F = Friendly
R = Respect
I = Intellection
E = Easy-going
N = Nice to each other
D = Dedicated

=)

This part as well:
And the other reason, is because of my style.. O_O Said what?
Of course, one of my lecturer said that I'm a Fashion Icon of Civil Engineering Department xD lolol..

But, what makes you didn't like me, because of my style?

I'm not saying MY STYLES ARE HOT!
WHAT I MEANT WAS I wear different than others in college. 
 THAT'S WHY MY LECTURERS CALLED ME THE FASHION ICON. I didn't made that up!
Most of them wear KURUNG (a traditional Malaysian dress).
I wear Korean or Japanese style apparel with pants. 
They wear high heels, I wear Supra sport shoes or ballerina flats. 

I rarely wear Kurung, I only wear it on presentation or final project day.
While they wear them, everyday.

THAT'S WHY!

To them, its different! I'm like a black sheep IN the white sheep colonies.
My outfit like stand out to them. I dunno why either.
Plus, everything, everyday, I wear is PURPLE.

My walking step like big pace, Kurung makes me slow down a bit. Also, it's a bit hot to wear that time.
Plus, you have to iron them all! I don't have time to iron due to my studies, hangouts or etc.

HIGHLIGHT : I DIDN'T SAID I HATE KURUNG.

And this part in the post
Yup, at my college have to wear "tudung" or scarf.. The Rules! =.= Therefore, I♥myself!
So, this friend said they dun wanna hang-out with me coz afraid of bad words spreading if they friends with me. Does that sound like I'm a bad icon? =.=

Where I underline; "The Rules" I meant, that my college rules GIRLS MUST WEAR TUDUNG or SCARF. BUT I DIDN'T SAID THEIR RULE!
I'm Muslim. I know my religion also said the same rules. But that doesn't mean I disrespect my religion. 
I didn't said I hate wear TUDUNG. 
I♥myself  meant for I love for who I am. My "they-so-call-weird" style.

If it's CRAP FOR YOU then I don't care coz that post LIKE 2 YEARS LATE.
People changed their trends as time goes by. I'm NOT asking for readers to FOLLOW WHAT I WEAR. 
I ask for opinion NOT HARASSING COMMENT! I even stated in that post;

I mean... Come on?

Is it look weird to you???

What part that you don't get it??
(For God's sake, this is like the same thing happen in that college) =.=
The point is, love of who you are. Your style, your life, yourself! Proud of your true self!

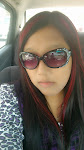
I know I showed many of my pictures in that post. AGAIN, I post them to ask for all of your opinion on the "WEIRD" style they said. NOT SHOWING-OFF, I'M HOT. hisshh =x=

ALSO, I'M NOT BEGGING YOU FOR MERCY!
(lolol sound like Duffy already xD)

These post or any other post are based on my experienced life I've been through.


If you think those post or any other post annoyed you, I suggest you leave my blog.

DON'T READ!
DON'T COMMENT! 
DON'T HARASSING MY BLOG WITH HATES COMMENTS!
JUST GET OUT WHEN YOU THINK THIS IS ANNOYING!
OR LOOK AT MY PICTURE IS ANNOYING!

I didn't ask for a pity or anything from readers. I'm just expressing myself.
I want to let it all out those feelings inside me. My blog = My world!

I always read my post 2-3 times before post it to avoid this kind of circumstances. I didn't ask for a fight. But this harassment comment, I've got nothing to said. 

Thankfully I read this "s*** comment" 2 years after. I might be couldn't concentrate at all in college.
I've already had a hard time during my college days.

10 HOUSE-MATES VS ME including my "best friends"
Being nice to house-mates are wrong?
My final project delayed to another semester becoz of "this person"
"This person" called me after 2 semester out of college and ask me to send his blackmailing and harassing msg to his ex-gf on my last crazy and tension semester. 

So, don't give me a hard time in my blog!

Oh well, everything have the upside-down.
I never thought letting out the confident would be a bad things =.="

Breath in~~ Breath out~~ Fuuu~~

It's 5:40 am already. I've let it all out and hopefully all readers get the picture.
INCLUDING YOU "TUT"!

AND SORRY FOR THOSE MISUNDERSTANDING THE POSTS.

Peace out!

MemeyMuaXx

Tutorial : Post Divider

Hello, everyone! Long time no update.. ^^"
As usual busy with my study and blogshop. Today, I'm going to show you what I've done recently.
As a reminder for me & also a tutorial for you guys! =)

I was looking for the perfect post divider for my blogshop, ~Purplelicious Passion~ Online Shop.
I got this Damask theme from HERE. Tq, backgroundfairy.com! ^^

Anyway, back to business! If you scroll down my blogshop. You'll see the post divider, right? =D
Or look at the picture below for easy sake! xP


Since, I can't find the perfect divider for damask.
Why not I create my own post divider using blog glitter name? =D 
So, let's start!

STEP 1 : COPY THE CODE

Go to your Blogger

Then to Design Tab (the red circle)

Then to Template

Choose Customize

Click ADVANCED 
then scroll down your selected menu "Page Background Color, Text Color, etc"
until Add CSS (CLICK IT!)

You'll see the fill in the blank box right?

LIKE THIS


Now copy these HIGHLIGHT code below and PASTE in those box.

.post-footer {
background:url(YOUR GLITTER LINK) no-repeat center;
height: 215px;
margin: 20px 0px -50px;
padding: 5px 10px;
}

The RED color words is your URL for the image/gif of your post divider.


STEP 2 : MAKE YOUR OWN GLITTER TEXT

Go to this link CLICK HERE

Create your glitter text as you like,  then CREATE TEXT
RIGHT CLICK THE GLITTER TEXT and OPEN IMAGE IN NEW TAB

Copy the URL, and paste on the RED words in the code.
If your glitter text like too small or too big, just change the size in the Glitter Text website

Make sure you check the preview below your Blogger Template Designer.
If it satisfy you, then Apply to Blog.

THAT'S IT! YOU'RE DONE =)
Thanks for spend time with my blog!

Check out my post divider!
|
|
V